对硬盘进行分区有很多工具,有图形界面的有命令行界面的,有商业的,有
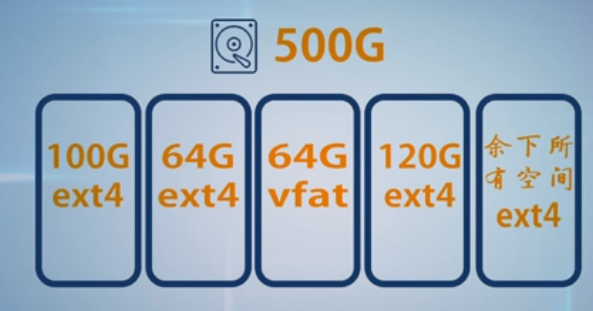
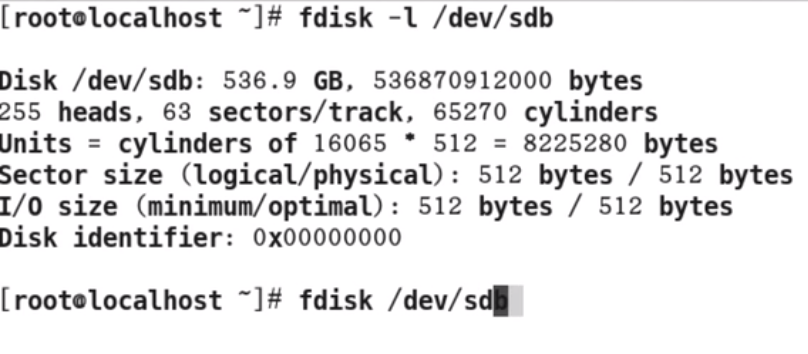
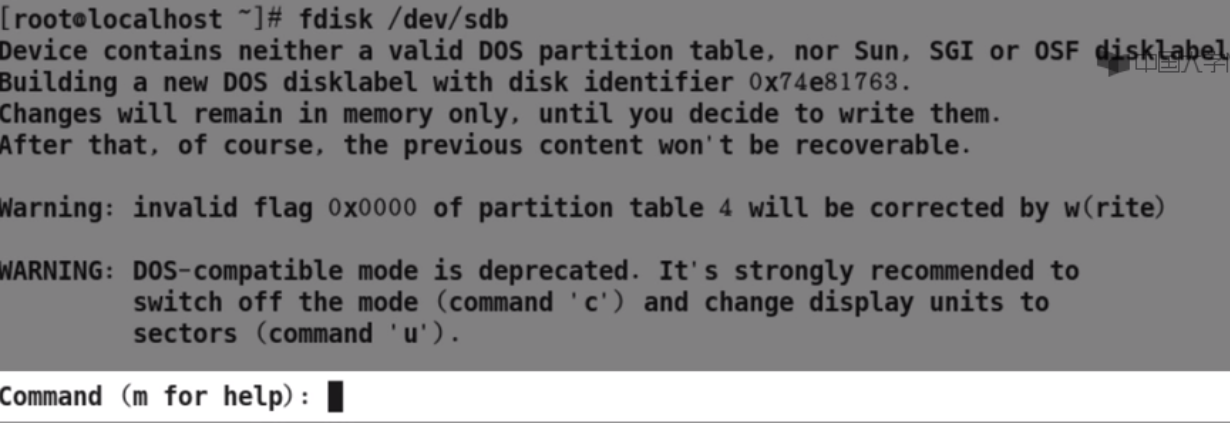
开源的,林林总总有好几十种。我们选择使用的是其中最经典的一个工具:fdisk。 fdisk 这个命令历史相当长,使用也非常广泛,在各个版本的 Unix、 Linux 和 Windows 中均有出现。 在命令行中输入 fdisk /dev/sdb 即进入 fdisk 对/dev/sdb 进行分区的界面, fdisk 会输出一些提示和警告,可以直接无视,最后一行是 fdisk 的快捷键提示行, 在“:”后就可以输入 fdisk 的快捷键进行分区操作了,如果你不了解 fdisk 的快 捷键,可以按“m”查看帮助文档,你也可以查看本任务中所提供的“fdisk 中的 快捷键”参考表。 [root ~]# fdisk /dev/sdb Device contains neither a valid DOS partition table, nor Sun, SGI or OSF disklabel Building a new DOS disklabel with disk identifier 0xa04d9ff7. Changes will remain in memory only, until you decide to write them. After that, of course, the previous content won't be recoverable. Warning: invalid flag 0x0000 of partition table 4 will be corrected by w(rite) WARNING: DOS-compatible mode is deprecated. It's strongly recommended to switch off the mode (command 'c') and change display units to sectors (command 'u'). Command (m for help): 接下来我们就新建第一个分区: Command (m for help): n #输入 n 新建一个分区 Command action e extended p primary partition (1-4) p #fdisk 会询问建立主分区还是扩展分区,我们选择 p,主分区 Partition number (1-4): 1 #输入分区号,必须小于 4,原因我们在前面项目 1 中已经讲过了,我们选择 1 First cylinder (1-65270, default 1): 1#输入分区的起始柱面号, 一般情况下默认即可 Last cylinder, +cylinders or +size{K,M,G} (1-65270, default 65270): +100G #输入分区的结束柱面号,当然也可以直接输入分区的大小,注意要加上“+”号 Command (m for help): p #列出分区表,我们可以看到第一个分区已经在了 Disk /dev/sdb: 536.9 GB, 536870912000 bytes 255 heads, 63 sectors/track, 65270 cylinders Units = cylinders of 16065 * 512 = 8225280 bytes Sector size (logical/physical): 512 bytes / 512 bytes I/O size (minimum/optimal): 512 bytes / 512 bytes Disk identifier: 0xaddf3d95 Device Boot Start End Blocks Id System /dev/sdb1 1 13055 104864256 83 Linux # Device Boot 分区名, Start 起始柱面, End 结束柱面, Blocks 表示块, 没有格式化 为#特定分区类型前所有块大小均为 1KB, Id System 标识分区类型和 id 号,默认均为 83 #Linux Command (m for help): w The partition table has been altered! Calling ioctl() to re-read partition table. Syncing disks. # 输入 w, 将新分区写入分区表,如这时按 q 退出,改变将不会写入分区表 将后面所有的分区都建立好: Command (m for help): n Command action e extended p primary partition (1-4) e # 输入 e, 表示建立一个扩展分区 Partition number (1-4): 2 First cylinder (13056-65270, default 13056): Using default value 13056 Last cylinder, +cylinders or +size{K,M,G} (13056-65270, default 65270): Using default value 65270 Command (m for help): n Command action
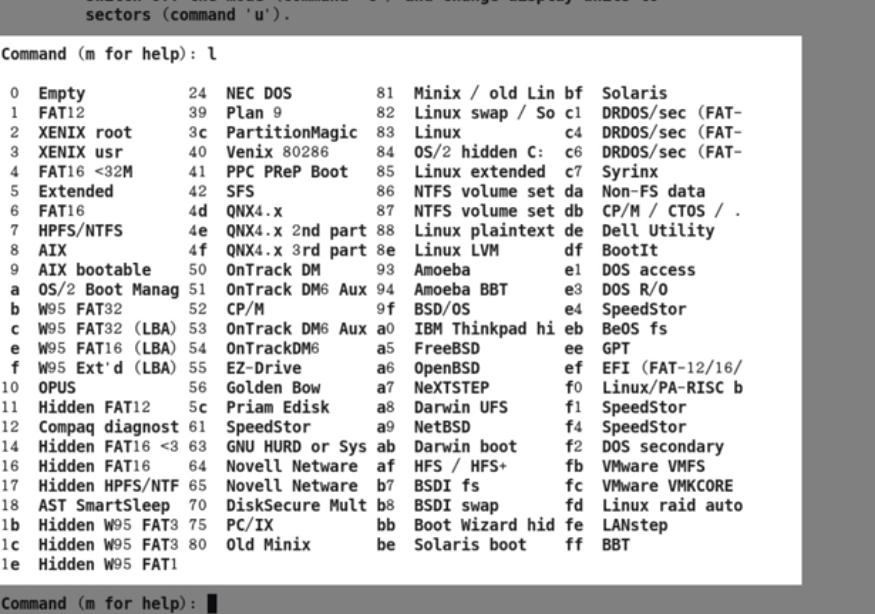
重要 fdisk 中的快捷键: a 设置启动分区标识 d 删除一个分区 l 列出所有支持的分区类型的 ID 号 m 列出快捷键帮助 n 增加一个新的分区 p 列出分区表 q 退出不执行任务 t 改变一个分区类型 w 执行任务并退出 l logical (5 or over) p primary partition (1-4) l # 如果建立好了扩展分区,在选择分区类型中就不再会出现 e 了,代之以 l,表示可以建 立 # 逻辑分区了,我们在这里输入 l 建立逻辑分区 First cylinder (13056-65270, default 13056): Using default value 13056 Last cylinder, +cylinders or +size{K,M,G} (13056-65270, default 65270): +64G Command (m for help): n Command action l logical (5 or over) p primary partition (1-4) l First cylinder (21412-65270, default 21412): Using default value 21412 Last cylinder, +cylinders or +size{K,M,G} (21412-65270, default 65270): +64G Command (m for help): n Command action l logical (5 or over) p primary partition (1-4) l First cylinder (29768-65270, default 29768): Using default value 29768 Last cylinder, +cylinders or +size{K,M,G} (29768-65270, default 65270): Using default value 65270 Command (m for help): w The partition table has been altered! Calling ioctl() to re-read partition table. Syncing disks. 查看建立好的分区: [root ~]# fdisk –l /dev/sdb Disk /dev/sdb: 536.9 GB, 536870912000 bytes 255 heads, 63 sectors/track, 65270 cylinders Units = cylinders of 16065 * 512 = 8225280 bytes Sector size (logical/physical): 512 bytes / 512 bytes I/O size (minimum/optimal): 512 bytes / 512 bytes Disk identifier: 0x2f7e945a Device Boot Start End Blocks Id System /dev/sdb1 1 13055 104864256 83 Linux /dev/sdb2 13056 65270 419416987+ 5 Extended /dev/sdb5 13056 21411 67119538+ 83 Linux /dev/sdb6 21412 29767 67119538+ 83 Linux /dev/sdb7 29768 65270 285177816 83 Linux #注意到从 sdb5 开始建立的分区均是在 sdb2 这个扩展分区中建立的逻辑分区,特别注意 #逻辑分区的分区序号是从 5 开始的,因为 1-4 是保留个主分区和扩展分区使用的 当然,如果出错了,如分区的大小、分区号等输入错误了,我们可以直接按 q 退出 fdisk,所有之前的操作都不会写入磁盘的分区表,我们也可以将出错的分 区删除。如我们可以将刚刚的分区 sdb7 删除,并重新分区。 命令序列 错误!文档中没有指定样式的文字。 -1 [root ~]# fdisk /dev/sdb WARNING: DOS-compatible mode is deprecated. It's strongly recommended to switch off the mode (command 'c') and change display units to sectors (command 'u'). Command (m for help): d Partition number (1-7): 7 # 输入 d, 表示删除一个分区,随后输入要删除的分区号 7 Command (m for help): w The partition table has been altered! Calling ioctl() to re-read partition table. Syncing disks. [root ~]# fdisk -l /dev/sdb Disk /dev/sdb: 536.9 GB, 536870912000 bytes 255 heads, 63 sectors/track, 65270 cylinders Units = cylinders of 16065 * 512 = 8225280 bytes Sector size (logical/physical): 512 bytes / 512 bytes I/O size (minimum/optimal): 512 bytes / 512 bytes Disk identifier: 0x2f7e945a Device Boot Start End Blocks Id System
注意 如果你操作的磁盘中某个分区正在被使用(典型情况就是磁盘包括根分 区),那么很有可能你对磁盘的分区操作不会马上被写入分区表的话,你需 要将使用中的分区卸载(umount)或者重启,才能够将新分区的信息写入分 区表. /dev/sdb1 1 13055 104864256 83 Linux /dev/sdb2 13056 65270 419416987+ 5 Extended /dev/sdb5 13056 21411 67119538+ 83 Linux /dev/sdb6 21412 29767 67119538+ 83 Linux [root ~]#
注意 在 fdisk 中列出的分区表的最后一个字段, Id System 表示分区的类型, 但在对分区进行格式化前,这个字段并非分区的真正类型,仅仅是一个标 识而已。
小心 在用 fdisk 对磁盘分区过程中,如果操作有误,可以按 q 键直接离开, 所 有之前的操作都不会写入磁盘的分区表, 如果确认所有的操作无误,按 w 键将操作写入磁盘分区表。
命令 用法: fdisk[选项]... 磁盘设备名.. 查看/修改磁盘分区表 -l 查看分区表


